Deploying Models
This tutorial covers the steps needed to giving HUGIN model a user friendly interface and deploying it online.
Using the HUGIN tool to interact with the model requires knowledge of the technology and experience with the tool. This may be a confusing experience for users with no knowledge on Bayesian networks or the specific domain of the model - and because ''excessive´´ information is presented on the screen. An example of this confusing scenario can be seen Figure 1 where a simple Bayesian model for the tracing of food contamination has been loaded in the HUGIN tool. This is the model the Simple Bio Tracability Example - check out the example for more information on the workings of the model.
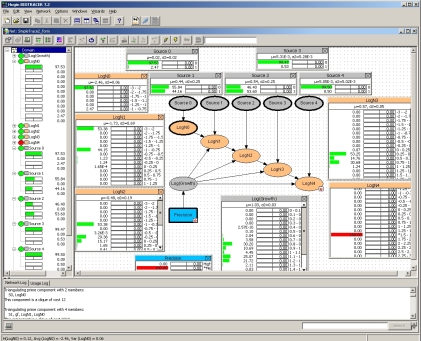
Figure 1: The HUGIN BIOTRACER tool. The screen contains too much information, and interaction with the model may not be obvious to users who are neither domain- or Bayesian experts.
To reduce the requirements on the user and to ease user interaction with the model, it may be better to deploy the model on a web page.
The HUGIN Web Solution allows the knowledge engineer to deploy a model as a web form such that the user can interact with the model through the web interface shown above. The deployment of a model as a web form on a web page requires a number of easy steps to be performed:
Step 1: Construct model
Using the HUGIN BIOTRACER tool, the model is constructed. In brief this procedure covers defining variables, dependencies and parameters.
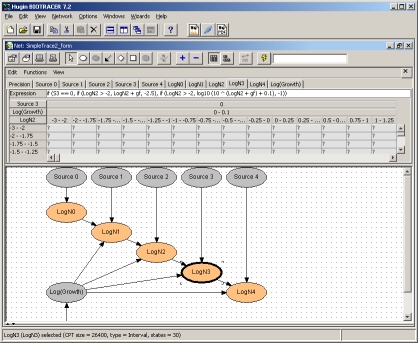
Figure 2: Model construction. Nodes as well as the graph structure are defined. Parameters are specified.
Step 2: Design web form
The next step is to design the web form which will act as the interface to the model when embedded on the web page. The web form designer is activated by clicking on the 'Web Form' button (see Figure 3).

Figure 3: Button that activates the web form designer.
The web form is designed by adding labels to provide feedback and fields for entering input. The labels and fields are tied to specific variables in the model. The web form designer can be seen in Figure 4.
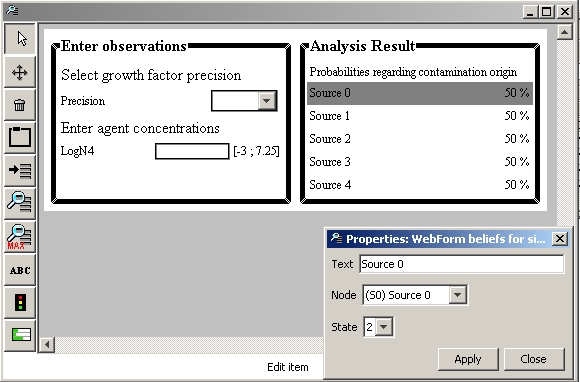
Figure 4: The web form designer tool (the 'Source 0' labes is being hardwired to display the belief for state 2 of variable S0).
Step 3: Upload model to Web Solution repository.
Once the web form has been designed the model is ready to be uploaded to the HUGIN BIOTRACER Web Solution model repository. This is done by connecting to the Web Solution by clicking on the connect button (see Figure 5).
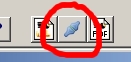
Figure 5: The connect to HUGIN BIOTRACER Web Solution server button.
A connection dialog appears where one should specify the url for a HUGIN BIOTRACER Web Solution server (default url biotracer.hugin.com is pre-entered). See Figure 6.
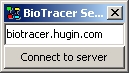
Figure 6: Connection dialog. Enter url for HUGIN BIOTRACER Web Solution server.
Once connected, the user must identify himself to the system using user name and password (see Figure 7).
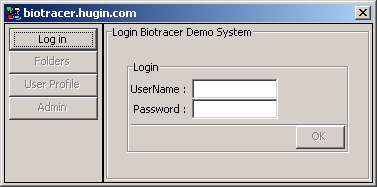
Figure 7: Log in to the system.
Brose to a folder, right click and select the option 'Upload from Hugin' (see Figure 8).
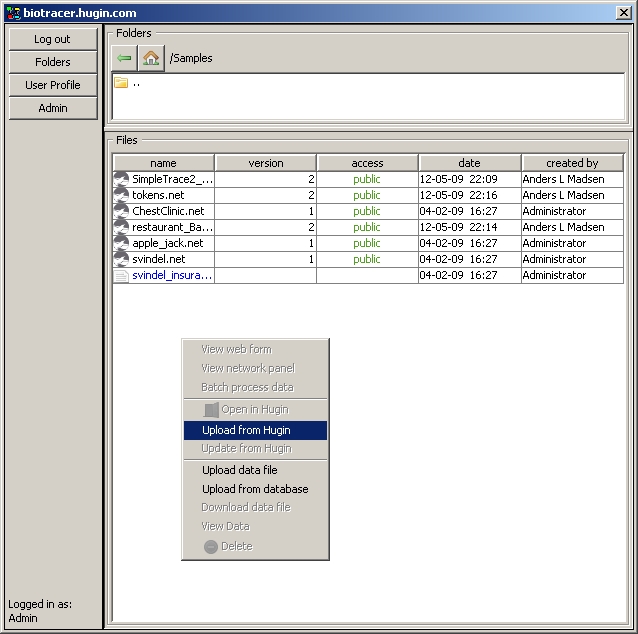
Figure 8: Right-click and select 'Upload from Hugin'.
In the next dialog that appears one must choose from the models currently loaded in the HUGIN BIOTRACER tool and specify a log message (see Figure 9).
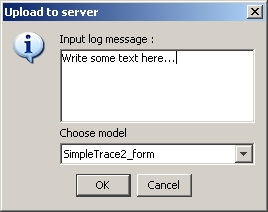
Figure 9: Upload model.
The model is now online and running in the Web Solution server!
Step 4: Insert applet-code on web page
The final step is to publish the model on the web page. To do this one must embed some code that tell the browser to load the HUGIN applet and parameters for the applet specifying which model to display. This block of code can be generated after uploading a model by right clicking the model and selecting 'Generate HTML' (see Figure 10).
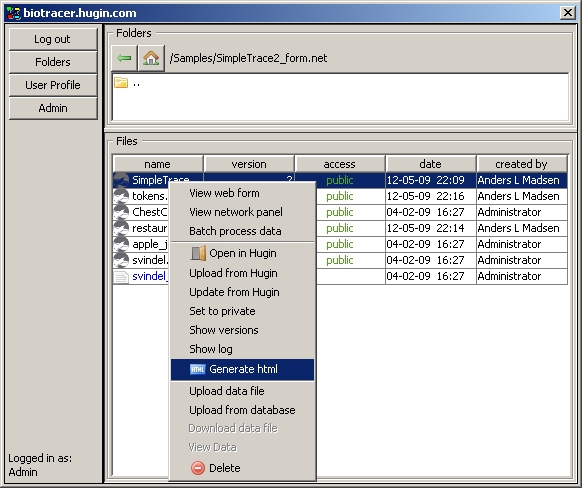
Figure 10: Generate html
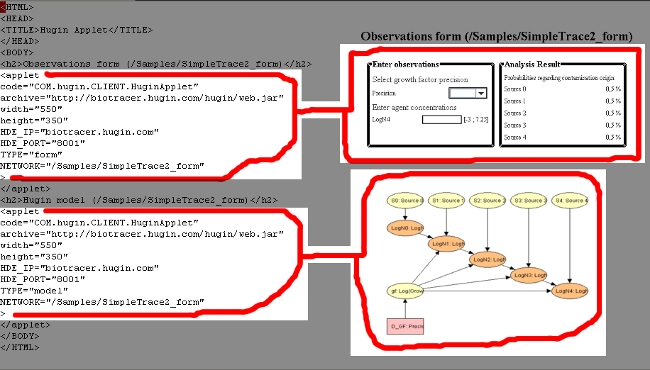
This generates a sample html-file which contains the relevant code for embedding the applet on a web page. The code can be copy-pasted to the web page source. Figure 11 displayes the important portions of the generated code.